


GravityWrite is an AI writing tool used to create blogs, ads, emails, and social media content quickly.
It is useful for bloggers, marketers, students, and anyone who needs written content without spending hours writing from scratch.
This guide explains exactly how to use GravityWrite step by step, so you can go from idea to finished content without confusion. Before using it seriously, you may also want to read this detailed analysis on whether GravityWrite AI is safe or legit so you can understand its reliability, risks, and real-world use better.

Step 1: Sign up
Step 2: Log in
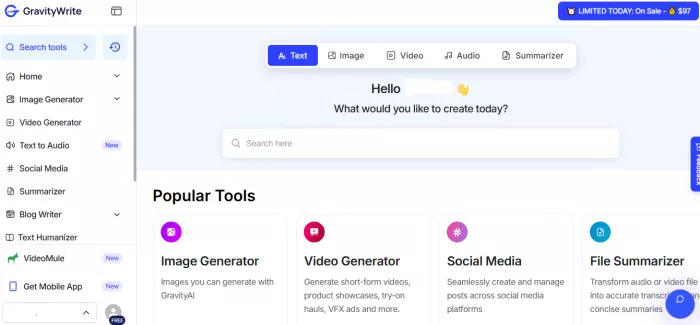
Step 3: First, look at the dashboard
The interface is simple and divided into a few main sections:
Templates section
This is where you choose what type of content you want to create, such as blog posts, ads, or social media captions
Editor
This is where your generated content appears and where you can edit it
Tools or features panel
Includes options like rewriting, expanding text, or generating ideas
Each section is designed to move you from idea to content in a few clicks.
Step 1: Choose a Template
Start by selecting the type of content you want to create.
Common options include:
Ad copy
Tip:
If you are writing long content, choose a blog or article template. For short content, use social media or ad templates.

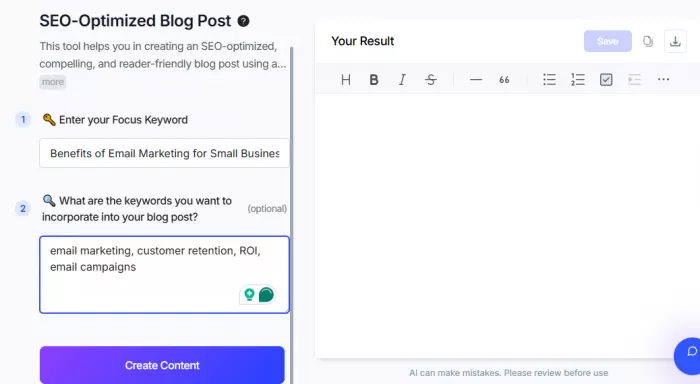
Step 2: Enter Your Input
You will be asked to provide basic details.
Typical inputs include:
Example:
Keep your input clear and specific for better results.
Step 3: Generate Content

Step 4: Edit and Improve Output
The generated content is a starting point, not the final version.
You should:
GravityWrite may also offer options like:
Use these to refine your content.
Step 5: Export or Use Content
Once your content is ready:
From here, you can publish directly or make final edits in your CMS.
Input:
Write a blog intro on digital marketing
Output (sample):
Digital marketing has become essential for businesses looking to grow online. From search engines to social media platforms, brands now have multiple ways to reach their audience. Understanding how to use these channels effectively can make the difference between slow growth and consistent results.
GravityWrite works best when you follow a simple, repeatable process instead of expecting instant perfect content. The steps in this guide are what make the tool effective.
In short, the workflow is:
When used this way, GravityWrite can quickly turn ideas into structured drafts, saving time on writing and ideation. It is especially useful for users who create content regularly and need speed without starting from scratch.
The key takeaway is that GravityWrite handles the drafting stage, not the final polish. The better your inputs and editing, the better your results.
For beginners, these steps make the tool easy to use without confusion. For regular users, following the same process consistently leads to faster and more reliable content creation.

Marketing teams often need images before a product is ready for a phot...

Creating a logo that will grab customers' attention is one of the main...

Enterprise software has a well-known failure mode. The demo goes great...

Most people who produce video at any real scale hit the same wall even...

A cinematic AI video needs more than realistic skin, dramatic lighting...

Have you noticed how difficult it is not to watch spoilers of a sporti...
Discussion